Introduction
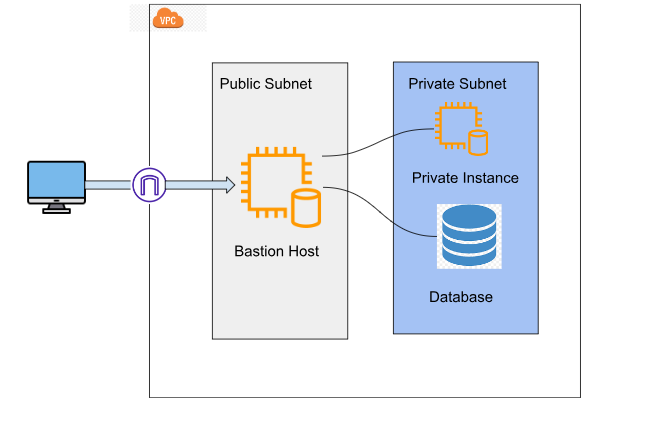
You may have different services that you don’t want to access from the internet, in that case, you use a private instance running on private subnets. Basically, these are the backend servers that don’t accept incoming traffic from the internet. In terms of security, this plays an important role in protecting your Private servers. Your back-end will not connect to the internet if you want to access it from your local machine you need a Bastion Host.
Bastion Host is a server that is exposed to a public network and helps you connect with private instances/ databases. So you need to ssh to the Bastion Host to access your instance.
Key Terminology
To perform this task you need to know some basic key terminologies
- Create a VPC first with a public subnet and a private subnet with its security group configuration.
- You need to create your private instance/Database in the private subnet and Bastion Host in the public subnet. If you want to learn how to create VPC you can check our other blog – Introduction to VPC.
Let’s set up an instance in a private subnet
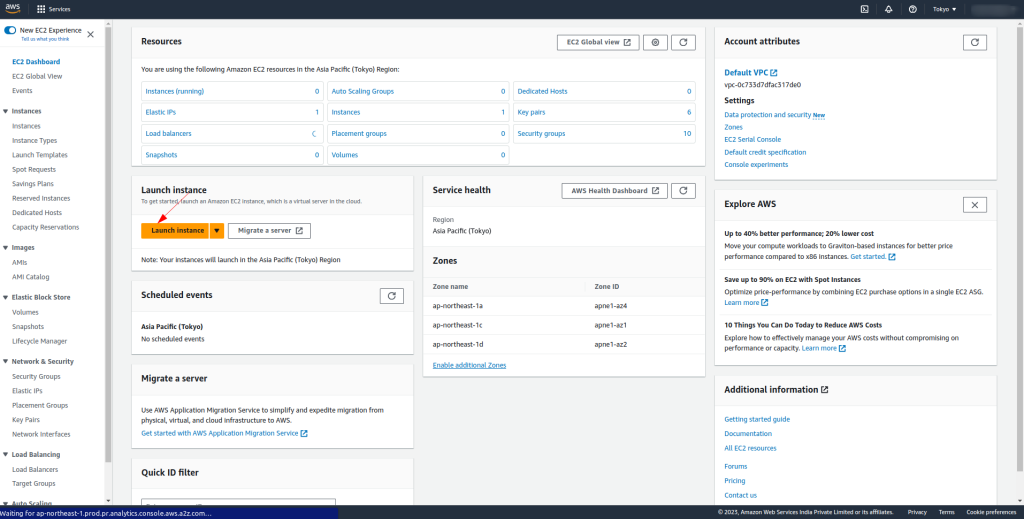
- Go to the EC2 dashboard and click on Create instance.
- Name your instance and select the OS according to your requirements.
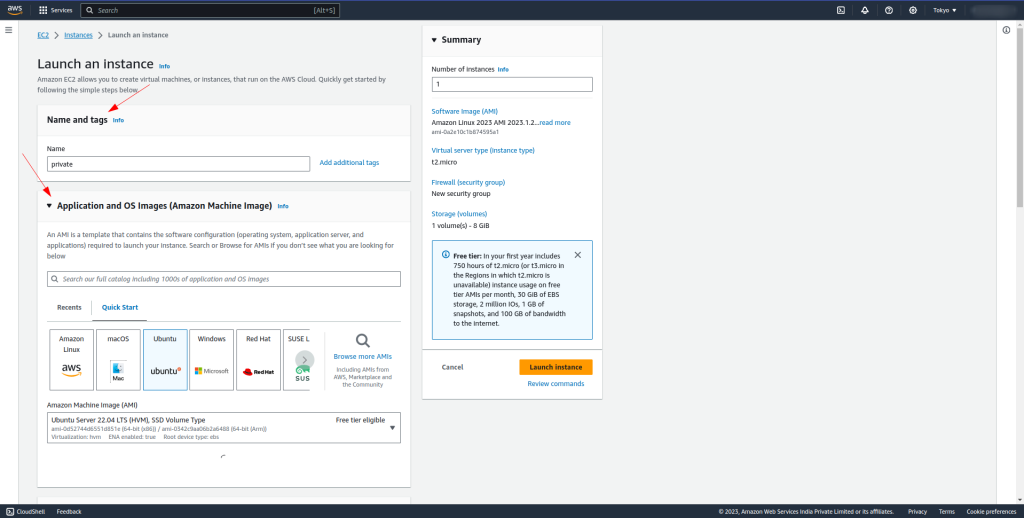
- Select the instance type for you and after that select a key pair.
- If you have the key pair then use it otherwise create a new key pair.
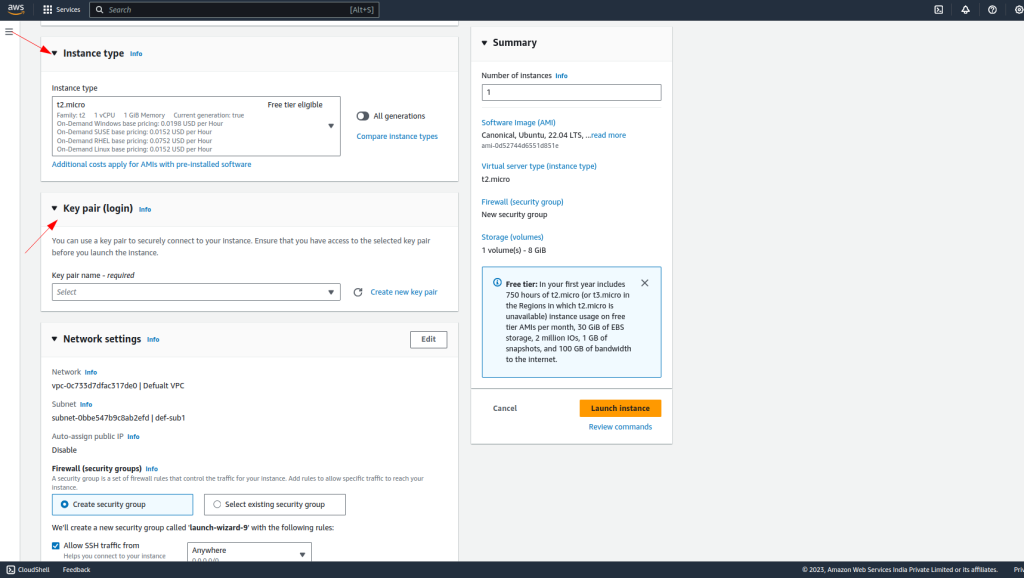
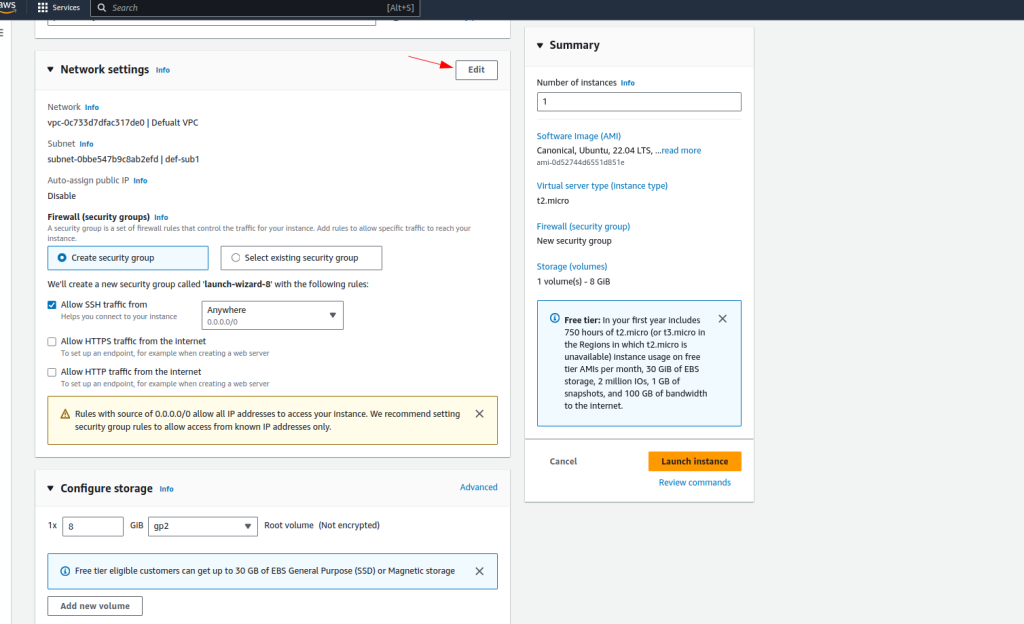
- Now it’s an important step to perform in this step you need to configure your instance in a private subnet click on the edit option in the network setting as shown below:
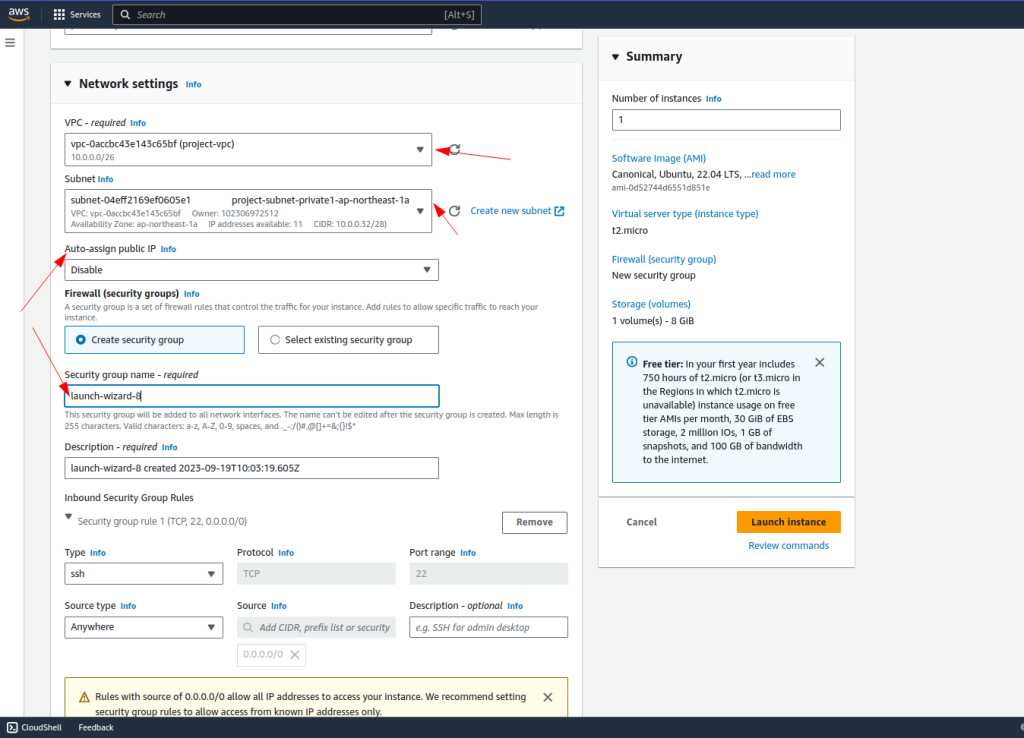
- Select the VPC in which you want to create your instance and just below it select the private subnet in which you want to create your instance.
- Set auto-assign public IP to disable if you enable it will automatically assign public IP to your instance.
- You can also use your existing security groups otherwise create one
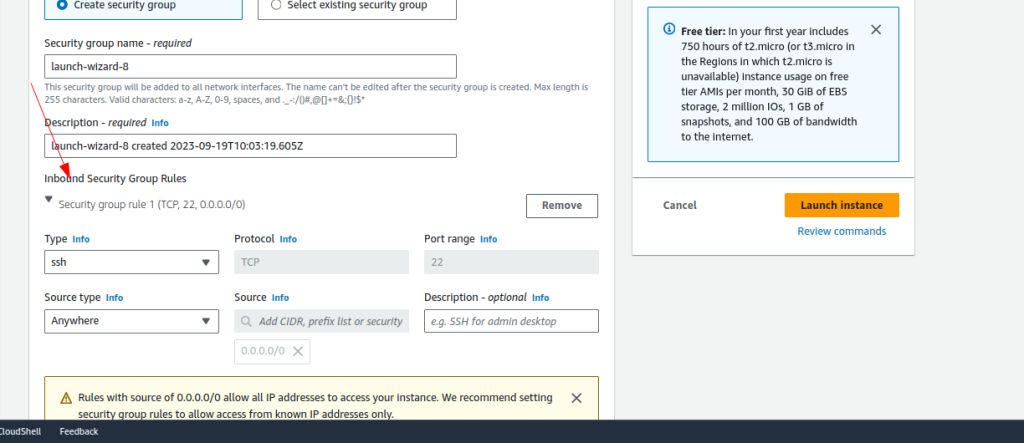
- Set inbound security group rules to SSH so that you can connect to your instance through SSH.
- Finally, configure your storage and click Launch instance.
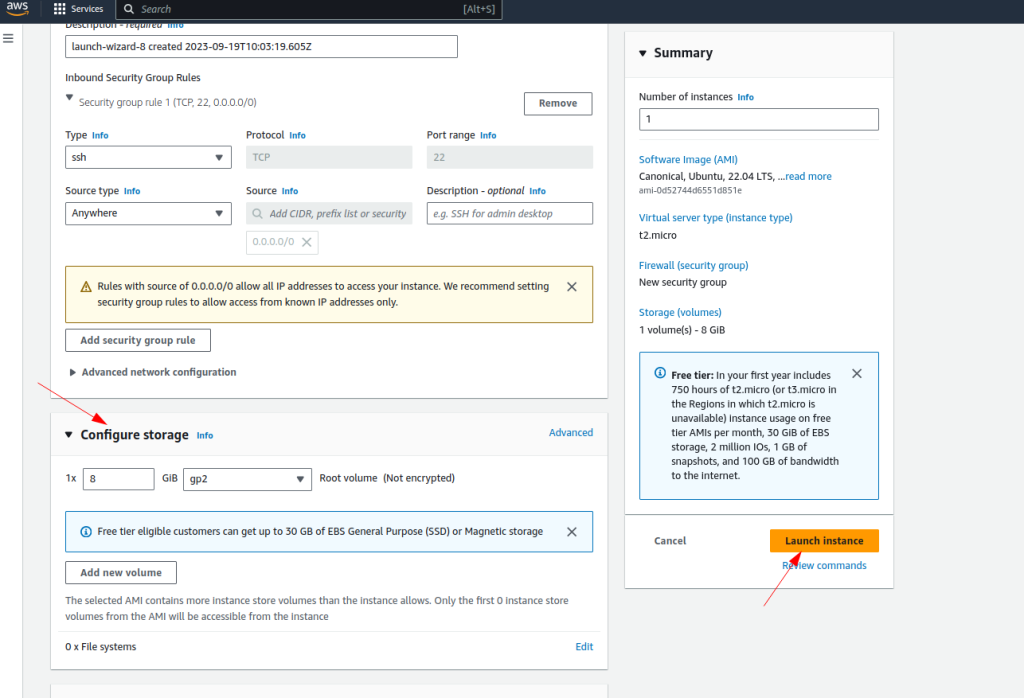
Let’s create a Bastion Host
- Again launch an EC2 instance, and follow the same for creating the instance.
- While configuring the network setting you need to add the same VPC in which you created your private instance, and you need to select the public subnet.
- Enable Auto-assign public IP to assign a public IP to your instance so that it can connect with the internet.
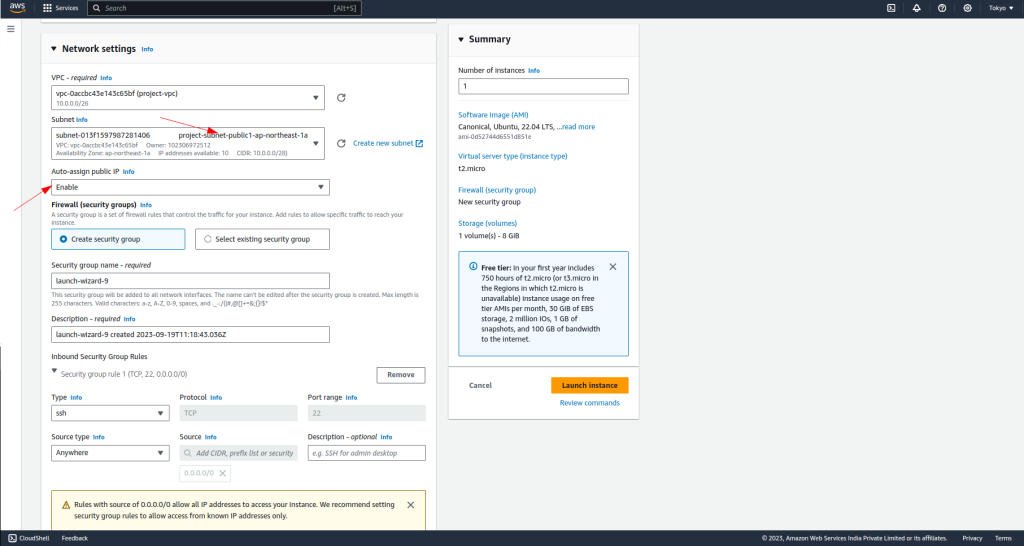
- In the security group section create a security group for Bastion Host.
- In the inbound rule add a rule for HTTP and HTTPS for internet traffic.
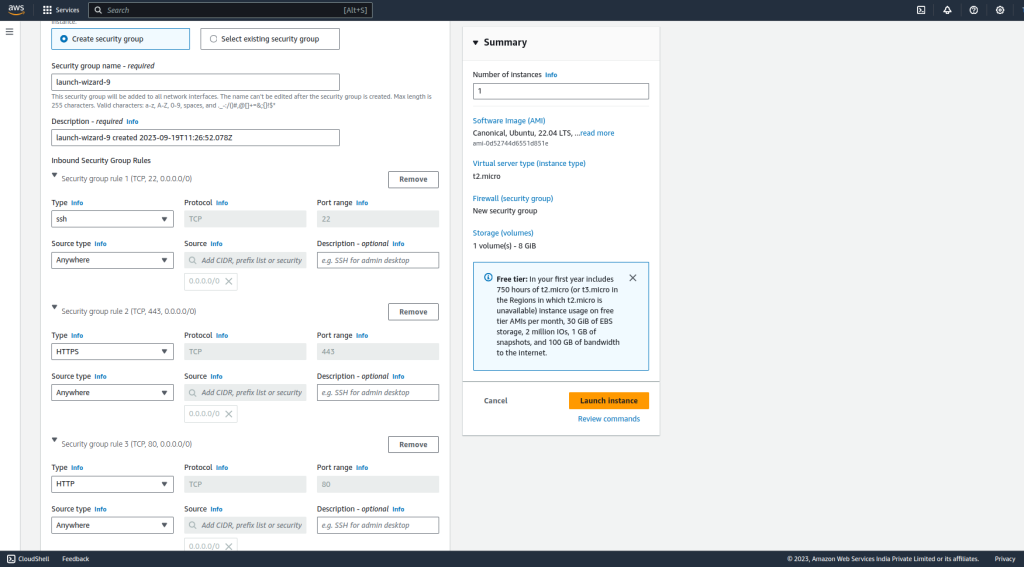
- Finally, configure storage and launch your instance.
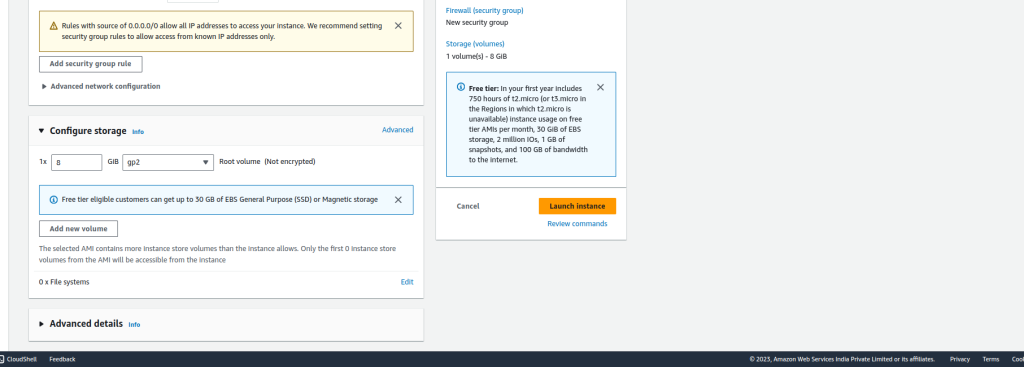
- Go to the instances dashboard you will see your instance and bastion host.
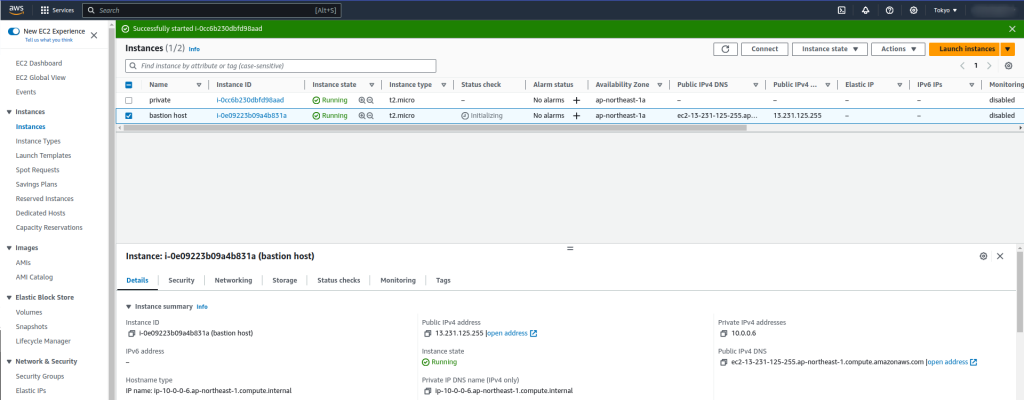
Access private instances through Bastion Host
- If you want to access your private instance firstly you need to access the Bastion Host
Accessing Bastion host
- Open the terminal of your local machine
- Connect to Bastion Host by ssh command
ssh -i “prproject.pem” [email protected]
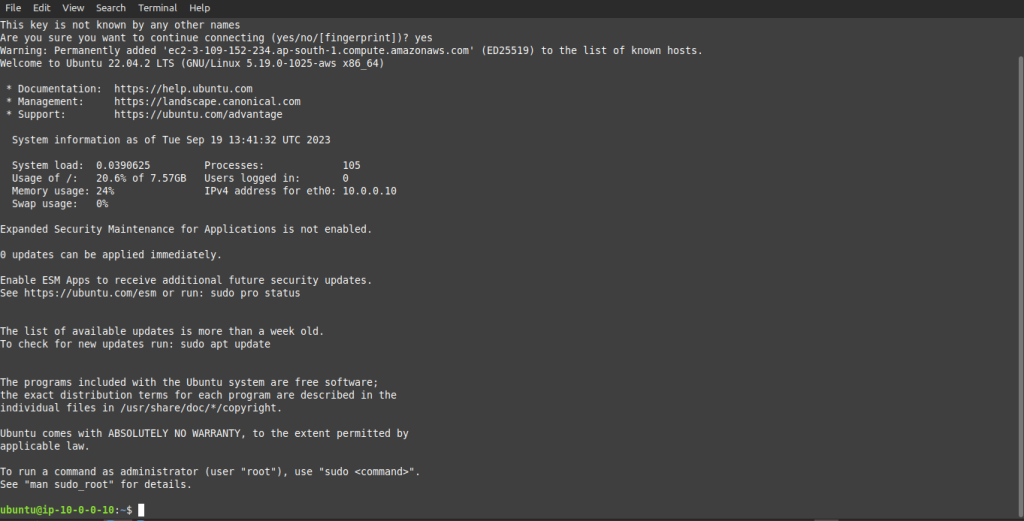
Access private instance
- Now you need to copy the key file to your Bastion Host.
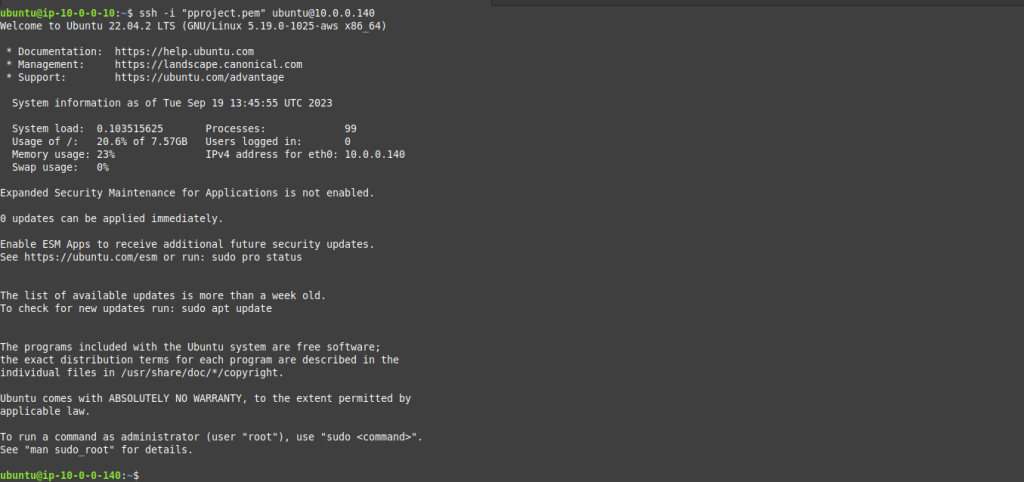
- After that run the SSH command on Bastion Host to access the private instance
ssh -i “pproject.pem” [email protected]
